
 +1-877-790-2297
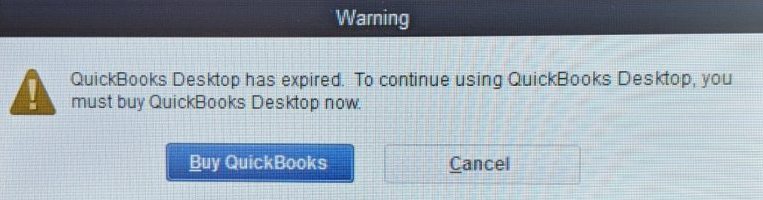
Once you install the QuickBooks Desktop on your workstations and the host server, it does not require you to validate the license every time. However, in recent times, users reported “QuickBooks Desktop has reached expiration date” error messages while accessing the company files. Due to the presence of this message, one cannot access the QBW32.exe file as QuickBooks Desktop needs to be renewed. Other problems can also hit such inconveniences in QuickBooks.
The guide demonstrates the best possible causes of the “QuickBooks Desktop has reached the expiration date” error message. Furthermore, we will help you with the relevant methods to fix the problem.
Why Do You See the “QuickBooks App Expired” Message?
When you reach the expiration date, QuickBooks Desktop needs to be renewed by using the license number(find QuickBooks license number). However, there can be several reasons you should be aware of. Check out the following details:
- Users encounter a “QuickBooks expiration date” pop-up when QuickBooks Desktop is not registered properly.
- When the trial period of 30 days is over and you have not registered with QuickBooks anymore, it may bring the expiration date popup on your screen.
- Due to the corrupted or damaged company files, you may find unexpected errors in QuickBooks.
- The license you are using to register QuickBooks is not valid.
If these are affecting the QuickBooks Desktop, you can simply go to renew it by purchasing the software. Thereafter, you can register and enter the license to activate the software.
What to Do When QuickBooks Desktop has Reached the Expiration Date?
Generally, you encounter the “QuickBooks Desktop has reached expiration date” pop-up message when you have used the free or trial period of QuickBooks Desktop. By re-registering or entering the license number, you can activate the service again. All you have to do is update the billing information and access the data.
However, there can be other reasons that you are not able to access QuickBooks company files. In such a scenario, you can perform the troubleshooting methods. For instance, you can end the QuickBooks-related process in the Task Manager, correct the Windows Firewall settings, remove the Entitlement Data File, or update the QuickBooks Desktop and server manager. By running the QuickBooks File Doctor Tool, you can also get rid of such interruptions. Let’s proceed with these methods with a manual procedure.
Fix 1: Update the Billing Information
When the trial period of using QuickBooks accounting software is over, you may receive a pop-up stating “QuickBooks Desktop has reached expiration date”. To get rid of this error message, you are required to update the billing information if you want to continue using QuickBooks Desktop.
To update the billing information, you can go to the Customer Account Management Portal to resume the service. To proceed with the same, you can look for the following steps:
- Browse “https://www.intuit.com/sign-in/”.
- Then, log in to the account by entering the correct user name and password.
- Once logged in successfully, you can click on the subscription or product for which you wish to edit the payment method.
- Now, check for the “Product” details for your “Billing Information”.
- Press the “Edit” button.
- Make sure you carefully update the “Billing Information”.
- Hit the “Save and Close” button.
After you finish syncing the license and billing information, you can use the QuickBooks Desktop and access your company files uninterruptedly. If you are still facing other issues with your accounting software, it could happen due to incorrect settings and corrupted files. Hence, in the following discussion, we will share more solutions using which you can fix the QuickBooks problems.
Fix 2: End QuickBooks Related Task in Task Manager
QuickBooks-related processes keep working in the background even when you are not using the software. In some instances, these processes may bring issues to the program. As a result, you fail to access the QuickBooks company files. To avoid such interruptions, you can simply end the task by going to the Windows Task Manager. Let us help you with the same:
- First of all, you will have to make sure that “QuickBooks Desktop” is not opened on your computer.
- To end the task, you need to open the “Task Manager”. For that, you can press the “Ctrl + Shift + Esc” keys together on your keyboard.
- Now, switch to the “Processes” tab.
- Here, you can sort the processes alphabetically to find the relevant result.
- Alternatively, you can search for the “QBW32.exe” file.
- Then, press the “End Task” button.
When you are done ending the running task in the background, you can close the Task Manager and launch QuickBooks Desktop. If you are still seeing the “QuickBooks Desktop has reached expiration date” error.
Fix 3: Configure Windows Firewall
QuickBooks expiration date message can be removed if you configure the Windows Firewall port settings. In this method, we will show you how to create Inbound and Outbound rules while setting up the required ports and TCP settings. You can perform these methods based on your QuickBooks version. You can pursue the following steps to configure Windows Firewall:
- Select the Windows “Start” menu located at the bottom left.
- Type “Windows Firewall” in the search bar.
- When the “Firewall” window opens, click on the “Advanced Settings” tab.
- Now, go to the “Inbound Rules” and click right on it.
- Select the “New Rule” option.
- Click on the “Port” button.
- Hit the “Next” button.
- At this point, you need to make sure that the “TCP” option is chosen.
- When you get into a field of “Specific Local Ports”, add the ports based on the version of your QuickBooks Desktop. For instance:
- QB 2020: 8019, XXXXX
- QB 2019: 8019, XXXXX
- QB Desktop 2018: 8019, 56728, 55378-55382
- QB Desktop 2017: 8019, 56727, 55373-55377
- After you enter the port number, you can press the “Next” button to continue.
- Then, click on the “Allow the Connection” option.
- Hit the “Next” button.
- Be sure all the profiles are marked and select the “Next” button.
- Now, you can create the rule by adding the name “QBPort(year)”.
- After that, click the “Finish” button.
As you create the Inbound rules, you can follow the same procedure for creating the Outbound rules. This will fix the errors occurring in QuickBooks Desktop.
Fix 4: Run QuickBooks File Doctor Tool
QuickBooks File Doctor Tool helps users to fix the bugs in accounting software. By downloading and running this tool on your computer, you may also get rid of the “QuickBooks Desktop has reached expiration date” pop-up message.
- Close the “QuickBooks Desktop” if running on your computer.
- Then, download the “QuickBooks Tool Hub” from the trusted source.
- While downloading the tools, you need to save the “QuickBookstoolhub.exe” file on your computer.
- Now, you can pursue the instructions displayed on your screen and agree to their terms and conditions.
- Once you successfully install the program, you can launch it to perform.
- Then, select the “Company File Issues” option.
- Hit the “Run QuickBooks File Doctor”.
- It may take a few minutes to open.
- Now, you can select the company file using the drop-down menu. In case you don’t see the file, click on the “Browse” button and search for your file.
- Here, click on the “Check your file” option.
- Press the “Continue” button.
- Add the QuickBooks administrator password.
- Hit the “Next” button.
By following these steps, you can easily remove the “QuickBooks Desktop has reached the expiration date” error message.
Fix 5: Delete the EntitlementDataStore.ecml File
If you are constantly seeing a “QuickBooks Desktop has reached expiration date” pop-up on your screen, you should try deleting the EntitlementDataStore.ecml File. To do so, you can perform these steps:
- Be sure QuickBooks Desktop and the QuickBooks processes are not running your computer.
- Then, launch the “Entitlement Data Folder” for your QuickBooks version and Windows operating system.
- After this, click right on the “EntitlementDataStore.ecml” file.
- Choose the “Delete” option.
- Click the “Yes” button to confirm your action.
Once you are done following these steps, you can launch the company file. Thereafter, continue following the instructions and register your application.
Fix 6: Update QuickBooks Database Server Manager
Outdated QuickBooks Database Server Manager can cause unwanted issues to your accounting software. If you are unable to access the file and are facing the “QuickBooks Desktop has reached expiration date” error, we suggest you update the QuickBooks Desktop and Database Server Manager. To perform this method, you can pursue the following steps:
- To get started, download the latest version of QB.
- Now, select the country using the “Select Country” drop-down menu.
- Then, click on the “Version” and “Product”.
- Press the “Search” button.
- Here, you can download the updates.
- Save the file to the location where you can access it easily.
- After this, you can click the file to open it and proceed with the installation.
- By updating your QuickBooks program, the “QuickBooks Database Server Manager” will be updated automatically.
- Now, reboot your server after completing the installation.
- When the server is updated, your workstations will show a message that your company file needs to be updated to function with your QuickBooks Desktop version.
- You may also get prompted to create a backup.
After you complete the whole procedure of updating QuickBooks Desktop and Database Server Manager, you can try to access the file. If you are still unable to open the file or the “QuickBooks Desktop has reached the expiration date” pop-up message, we have more solutions to fix this.
Conclusive Words!
If your QuickBooks app expired, you can activate the service by updating the billing information. However, company files may bring errors due to several reasons. By implementing repairing methods, you can troubleshoot the error easily. Here, we have shared a number of methods using which you can remove the expiration date pop-up message and access the files.
QuickBooks may bring other types of error codes. If you are confronting any of the following problems in QuickBooks, we have effective methods for the same: