
 +1-877-790-2297
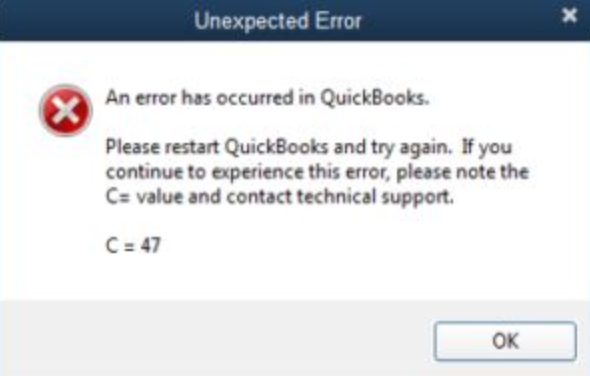
QuickBooks software functions based on multiple algorithms and codes. These codes can put your accounting software into errors. QuickBooks C 47 errors can be spotted when you post any payment to your customers. However, by restarting the QuickBooks program, the error can be easily resolved. Unfortunately, this trick does not seem to work in every case. If you are confronting the QuickBooks C 47 error message, we suggest you go to the depth and find out the main cause of the error. By doing so, you can easily fix the issue occurring in QuickBooks. Read this guide to know more.
In this particular guide, you will read about a brief description of the C 47 QuickBooks error, its main causes, and several ways to troubleshoot the error.
Read About C 47 QuickBooks Error
QuickBooks C 47 error occurs due to the misconfigured Internet Explorer. The error can also be displayed when cleaning up the Windows server. As a result, your accounting software fails to locate the transactions. Due to the presence of this error, you may not be able to process the same time update. Generally, users encounter such issues when they remove any transaction from the report.
Leading Causes of QuickBooks C 47 Error
QuickBooks is prone to technical errors. There are always valid reasons behind such errors. Similarly, QuickBooks error C 47 can be caused due to numerous reasons. Some of them are listed below:
- QuickBooks data files are corrupted or damaged.
- Due to the presence of QuickBooks data in an old backup file, you may face errors.
- If you have made changes to the registry, it may cause issues with your system.
- Incorrect settings of Internet Explorer or SSL settings may bring QuickBooks error C 47.
- If your transaction log (TLG) file is located in the corrupted folder, the error is likely to appear on your screen.
- There can be other factors that lead to QuickBooks C 47 error. By implementing the appropriate troubleshooting method, you can fix the error and can work on your QuickBooks account efficiently. Let’s know what all methods can be used to fix the error.
How to Troubleshoot the QuickBooks Error C 47?
Before you move forward to fix the error, we want you to check the file and make sure that the required files are available on your system. There are several files that need to be recovered. For instance:
- QuickBooks data file (.QBW)
- Transaction Log file (.TLG) which can be found in a folder where the QBW file is stored.
- Also, backup the QB data file such as .QBM, QBB, or QBW.
Once you make sure of these things, you can continue fixing the error that is affecting your accounting software.
For fixing the C 47 QuickBooks, you should run the rebuild data utility, update driver software, repair DLL files and QuickBooks Desktop. In addition, you can update the QuickBooks program if required and resort to the list such as items list and customer list. Let’s read more to find the step-by-step instructions.
Fix 1: Perform Rebuild Data Utility
By running the rebuild data utility, you can eliminate the errors affecting your QuickBooks program. In addition, you can verify the errors instantly after repairing the damaged data. In this method, we will show how to repair and verify the C 47 QuickBooks error in the following steps:
Run the Rebuild Data Utility to Repair Error
- Open the “QuickBooks” program on your computer.
- Once launched, navigate to the “File” menu from the top left.
- After this, select the “Utilities” option.
- Now, you can choose the “Rebuild Data” option.

- When you receive the confirmation pop-up, click the “OK” button to continue.
- Right after that, you will receive another pop-up for taking a backup of the company file. You can click on the “OK” button to continue.
- Once done, press the “OK” button to finish the rebuild process.
Run Verify Utility to Check the Error
- From the “File” menu, click on the “Utilities” option.
- This time, you are supposed to select the “Verify Data” option.
- At this point, if you don’t find any problem with your data, click on the “OK” button. Thereafter, you can continue using the company file.
- However, if you spot any problem with the data then you have to click on the “Rebuild Now” or “View Errors” option.
This is how you can repair the damaged data and verify it later. In most cases, the error gets resolved with this formula. However, if the QuickBooks C 47 error message persists, you can try other methods.
Fix 2: Update the Driver Software
System drivers are required to run your computer and support other programs. If the driver’s software is not updated to the latest version, QuickBooks error C 47 is likely to appear on the screen. Thus, you should go to the Device Manager and update your driver software. Let us help you with this procedure.
- Click on the “Start” menu.
- Type “Device Manager” in the search bar.
- Then, click on the “Device Manager” when it appears in the result.
- At this point, you are required to choose a category to find the device names.
- Once found, click right on the one you want to update.
- Now, click on the “Search automatically for updated driver software”.
- Click on the “Update Driver” option.
In case your system does not search for the new driver automatically, you can find it manually. All you have to do is go to the manufacturer’s website, download the drivers, and install them following the on-screen instructions.
Fix 3: Update QuickBooks and Resort the Files
Running accounting software with outdated versions can also be the reason for unexpected errors. Updating the QuickBooks Desktop can help you to get the QuickBooks C 47 error. Once your software is updated, it is also important to resort to the files. Check out the following steps to understand better.
Update QuickBooks Desktop
- To update the QuickBooks software to the latest version, click on the “Help” menu.
- Then, select the “Update QuickBooks Desktop” option.
- After that, click on the “Update Now” button.
- You can also choose the “Reset Update” checkbox. This will clear the old updates you downloaded before.
- As you click on the “Get Updates” it will start downloading the updates.
- Once the process is finished, restart your QuickBooks program and complete the installation.
Resort the List
- After updating the “QuickBooks Desktop”, search for the “Lists” option.
- Once found, click on it.
- Then, click on the “Chart of Accounts” option.
- After this, select the “View menu”.
- Select the “OK” button.
- Here, you need to select the “resort list” option from the menu list.
- Click on the “Item list” and make the required changes.
- After checking the item list, you can follow the same procedure for “Customer list”.
- Once done, go to the “Customer Center”.
- Then, select the “Customers and Jobs” option.
- Click on the “View menu” from the options.
- Press the “Resort lists” from the submenu items.
After performing the list resorting process, you can close your QuickBooks program. Make sure you reboot the system and launch QuickBooks to check if the error is still there.
Fix 4: Repair DLL File and QuickBooks Program
Due to the corrupted DLL file, your QuickBooks program brings complications. If you repair the DLL file, it becomes easy to remove the QuickBooks C 47 error message. Once you repair the DLL file, we also suggest you repair the QuickBooks program to avoid errors.
Repairing the DLL Files
- To repair the “DLL” files, you need to download the “Beneath catch” so that you can recognize the issue. Doing so, you can fix the issue in loading\3\LXCRtime.dll”.
- Now, click on the “Repair” button.
- When you see a dialog box, click on the “Select all” button. This will troubleshoot numerous errors affecting your QuickBooks software including QuickBooks C 47 error.
Repairing QuickBooks Program
- Use the “Windows + E” key combination to launch the “Computer” window.
- Then, select the “Uninstall” or Change a Program” option.
- Now, click on the “QuickBooks” program from the list of programs.
- Press the “Install/Change” option.
- When you see the “QuickBooks Installation” screen, click on the “Next” button.
- Press the “Repair” radio icon.
- Then, hit the “Next” button.
- Click on the “Repair” button.
- Press the “Finish” button.
By repairing the DLL files and QuickBooks program, you can easily fix the C 47 QuickBooks error. Make sure that after repairing the program, you restart the Windows computer and check if there is any database error.
Conclusive Words
It is pretty common to find certain error codes when working with the QuickBooks Desktop. QuickBooks error C 47 can be caused due to corrupted data files and wrong internet settings. If you configure the internet settings or repair QuickBooks programs, the error can be removed easily from your screen and you can perform your business operating efficiently.
Are you facing this error 15107 in QuickBooks? If so, check this guide to find the solution.