
 +1-877-790-2297
Recognized as a helpful feature, the QuickBooks check register allows you to perform a number of functions. Even though the check register can help you do a number of things, many of you may not have the complete knowledge needed for using it. In an effort to provide you with every piece of information needed to use it, we have crafted this post.
This extensive post will cover various methods to educate you about the meaning and usage of the QB check register. Going further, you can learn how to access, print, and export the check register in this Intuit accounting software. The methods covered here will be apt for the users of QuickBooks, QuickBooks Online, QuickBooks Desktop, QuickBooks 2015, and QuickBooks Enterprise.
- What is a Check Register in QuickBooks?
- How to Use the Check Register in QuickBooks Online or Other Versions?
- Methods for Accessing the QuickBooks Check Register
- 3.1) How Do I Get Access to the QuickBooks Check Register Report?
- 3.2) How to Get the Check Register in QuickBooks Online?
- How to Run a Check Register Report in QuickBooks?
- Methods for Printing the QuickBooks Check Register
- 5.1) How to Print the Check Register in QuickBooks?
- 5.2) How Do I Print a Check Register in QuickBooks Desktop?
- 5.3) How to Print a Check Register in QuickBooks 2015?
- How to Exporting the QB Check Register
What is a Check Register in QuickBooks?
In QuickBooks, the check register consists of all the checks of your company. In it, you can also find the cash transactions which have been recorded in an accounting period. The QuickBooks check register is also used by several businesses for carrying out the calculation of the existing balance of their accounts.
For every checking amount, a separate check register can be maintained. The main purpose of the check register in QB is to organize the information of transactions. It will be helpful to know that the register comprises multiple sections. These sections can tell you about the account balance, transaction’s date, check number, check category, description, as well as debits and credits linked to the transactions.
How to Use the Check Register in QuickBooks Online or Other Versions?
During the process of accounting, the check register in QuickBooks Online, QuickBooks Desktop or other versions of the software plays an important role. Using the registry, you can learn the types of transactions made by your company. Using the same, you can also make certain changes. With the QB check register, you can get a record of the bank balance in your account.
In addition, the check register can help you maintain a budget, prevent overspending, reconciling the bank statements, checking for mistakes, organizing various transactions, and a lot more.
Methods for Accessing the QuickBooks Check Register
Prior to using the check register in the QB accounting software, you will have to know the procedure for accessing it. We have displayed two methods below to help you out with the same. If you’re using QuickBooks, please follow the first method. The second method should be used if you have QBO.
3.1) How Do I Get Access to the QuickBooks Check Register Report?
For those of you who have no clue how to access the QuickBooks check register report, this section has been crafted. To access this report in the accounting software, you can sign in to it and run your company file. Pick Register in Banking and head to the File menu. From here, you can choose the Print Register option. After fixing the Date Range, the prints tab will provide you with the QB check register report.
- Ensure that you have logged into your QB account.
- Open the company file.
- The third step involves opening the register that has to be printed. For this, select “Banking”. Then press the icon of “Register”.
Important: On the off chance that you have several bank accounts, select the one that has to be printed.
- Press “Ok”.
- Tap on “File”.
- Click on “Print Register”.
- A dialog box is likely to turn up. It will present you with several options. Go through them.
- Set the “Date Range”.
Important: Setting the “Date Range” will be essential when the report has to be printed for specific dates instead of the present fiscal year.
- Enter the tab of prints to print the check register report in QuickBooks.
3.2) How to Get the Check Register in QuickBooks Online?
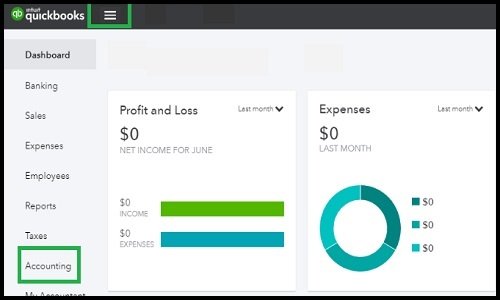
Users often ask us “Where is the check register in QuickBooks Online”. If you’ve got the same question to ask, then let us tell you that you’ll find it in the View Register option. To find this option, you can first go to Accounting in the dashboard. The Chart of Accounts will carry the Account option. As you select it, View Register will be found.
- See to it that “QuickBooks Online” is running.
- Access the left dashboard of the Intuit software.
- Select “Accounting”.
- Pick the “Chart of Accounts”.
- Then click on “Account”.
- Tap on the option of “View Register” under the column of “Action”.
We hope that the 6 steps given above helped you find out how to find the check register in QuickBooks Online.
How to Run a Check Register Report in QuickBooks?
For running the QuickBooks check register report, you only need to invest a couple of minutes. Tap on Accounting and further enter the Chart of Accounts (COA) tab. Hit a click on the View Register option. After this, the option to run the report will be made available.
- Run the “QuickBooks” software as the first step.
- On the left, click on “Accounting”.
- In the “Chart of Accounts” tab, the checking account has to be found.
- Choose the option of “View Register” via the dropdown. You will find this option in the column titled “Action”.
- Press “Run Report”.
Important: In the top-right corner, you will find “Customize”. In case any piece of information has to be excluded or included, you can use the “Customize” option to do so.
Methods for Printing the QuickBooks Check Register
Different versions of QuickBooks make use of different methods for printing the check register. Here, we have stated the methods to print it in QuickBooks, QuickBooks Desktop, and QuickBooks 2015. Quickly go through them to start printing the QB check register.
5.1) How to Print the Check Register in QuickBooks?
Now, let’s explore the best method to find out how to print the check register in QuickBooks. To establish this, visit Lists and prefer selecting COA or Chart of Accounts. Find Bank Account and right-tap on it to choose QuickReport: [Bank Account]. To continue, you can adjust the dates and customize the report. When every step has been covered, you can print the check register.
Let’s walk you through the step-by-step way of doing this.
- Click-open “QuickBooks” and opt for “Lists”.
- In the second step, the “Chart of Accounts” has to be preferred.
- This is followed by right-tapping on your “Bank Account”.
- You will now see “QuickReport: [Bank Account]”. Select this option.
- Make changes to the “Date”.
- Press the button for “Customize Report”.
- Click on “Filters”.
- In “Search Filters”, enter the “Transaction Type”.
- Click on “Check”. You will find it in the dropdown option.
- Press “Ok”.
5.2) How Do I Print a Check Register in QuickBooks Desktop?
In QuickBooks Desktop, the check register can be printed via the Banking option. In this option, you’ll find Use Register. You can choose a bank account for viewing. Via File, you can pick the Print Register option. As you set the Date Range, you’ll be closer to printing the register in QuickBooks Desktop.
- Go to your company file. From within this file, opt for “Banking”.
- Click on “Use Register”. As an alternative, you can press the icon of “Check Register”. By visiting the “Home” screen, you can find this icon.
- Choose that bank account which has to be viewed.
- Now, select “File”.
- Tap on “Print Register”.
- The next step requires you to pick a “Date Range” for which the print is required.
- Press the “Ok” button.
- Now, certain additional options will be available on your screen. You can use them for customizing the print.
- In case the existing list seems fine, you can press the “Print” button.
5.3) How to Print a Check Register in QuickBooks 2015?
To print the check register in QuickBooks 2015, you can simply go to Banking and make a selection for Use Register. With the help of the dropdown list, you’re required to pick an account register. Then in File, the option to print the register will be given.
To continue, we’ll suggest that you read the following 16 steps:
- Clicking on “Banking” is the first step.
- Now, tap on “Use Register”. You can also tap on the icon of “Check Register”. You can go to the “Home” screen for finding this icon.
- In case you own multiple bank accounts, you can go through the dropdown list available. Using this list, you can pick the account register that has to be printed.
- Now, press “Ok”.
- Select the “File” option.
- Click on “Print Register”. As an alternative, you can press the button for “Print”. You can find this button on the upper side.
- The dialog box for “Print Register” will be seen. Every time a register is opened for any account, this dialog box will be visible. Fill in the fields labelled “Through” and “From”. As you fill these fields, the “Date Range” will be set.
- As an optional step, you can click on the checkbox for “Print Splits Details”.
- Then press “Ok”.
- Tap on “Print”.
Important: Prior to performing the tenth step, in case you would like to make changes to the “Print Lists”, you can do them. This is an optional step.
- As an optional step, choose “File” in case you would like to print your report to disk. You can go through the options under “Print To”. These have been mentioned as follows:
i) “ASCII Text File”
ii) “Comma Delimited File”
iii) “Tab Delimited File”
Important: The option “ASCII Text File” should be selected for creating one text file. Using the “Comma Delimited File” option, the register can be imported as a spreadsheet at a later point, if you wish to. In case the register needs to be imported as a database program, the third option, “Tab Delimited File” should be picked.
- Select the orientation of the paper.
- You can suggest the QuickBooks software about the pages that have to be printed. This is an optional step and will be helpful for limiting the pages you want to print.
- Click on the checkbox for “Print in Colour” if you wish to. You can also skip this step as per your preference.
- Tap on “Preview”.
- Finally, press “Print”.
How to Exporting the QB Check Register
Should you like to export the check register in QB, the three methods given below will be worth reading. These methods will be fit for exporting the check register in QuickBooks, QuickBooks Desktop, and QuickBooks Enterprise.
6.1) Method 1: How to Export the Check Register from QuickBooks?
This section will help you get familiar with how to export the check register from QuickBooks. Once you’re signed into the software’s dashboard, head to Banking. Through the Edit option, pick Use Registers. For selecting the register you would like to export, go to Check Registers. After selecting some more options, you’ll be able to export the check register in QB.
- Make sure that you are signed into the dashboard of “QuickBooks”.
- Visit the tab called “Banking”.
- Look for a dropdown menu called “Edit”. Click on it and select “Use Register”.
- A list carrying the “Check Registers” will be shown to you. Pick the register that has to be exported.
- Press “Ok”.
- Go to the tab titled “Print”.
- Enter a “Date Range” for printing, saving or exporting the chosen check register.
- Press “Ok”.
- Click on “Settings”.
- Select the “File” option.
- Pick one of the options displayed as follows:
i) “Comma Delimited File”
ii) “ASCII Text File”
iii) “Tab Delimited File”
Important: In case you would like to export the QuickBooks check register to Excel, selecting the “Comma Delimited File” format option will be suggested. If you would like to print the file, then you can select any one of the formats displayed above.
- Opt for a location you would like to prefer. You can press “Browse” to opt for the same.
- Go to that location which was preferred by you in the twelfth step.
- Then press “Save”.
6.2) Method 2: How to Export the Check Register to Excel in QuickBooks Desktop?
One of the most commonly asked questions “Can the users of QuickBooks Desktop export the check register to Excel?” will be answered here. For exporting the same in QuickBooks Desktop, you can head to the Reports Menu. Find and pick Memorized Reports. This is followed by selecting the options Company and Balance Sheet. Finally, using the Toolbar, you can export the check register to Excel.
- Open the “Reports Menu” in “QuickBooks Desktop”.
- Select “Memorized Reports”.
- Pick the “Company” option.
- Opt for the option of “Balance Sheet”.
- Access the “Toolbar”. You will find “Excel” here. When found, click on it.
- Click on “Create New Worksheet”.
- Press “Ok” when you wish to export it.
6.3) Method 3: How can I Export the Check Register in QuickBooks Enterprise?
The users of QuickBooks Enterprise can export the check register via the menu called Edit. Then you can click on Use Register and further decide the Check Register you need. Ensure that you’re selecting the Comma Delimited File option for exporting the check register to Excel in QuickBooks Enterprise.
- Entering the “Edit” menu is the basic step of this method.
- Tap on “Use Register” via the dropdown option.
- Select the QB “Check Register” which has to be used.
- Press “Ok”.
- Tap on “Print”.
- You will find two fields labelled as “From” and “Through”. Fill in these fields for setting the dates.
- Tap on “Ok”.
- In the dialog box of “Print Lists”, click on the tab of “Settings”.
- Press the radio button labelled as “File”.
- You will find the options “Comma Delimited File”, “ASCII Text File”, and “Tab Delimited File” in the dropdown option. In QuickBooks, to export the check register to Excel, you will have to select the “Comma Delimited File” option.
- Tap on “Print”.
In Brief
We have been helping our readers to understand the usage of QuickBooks better. Here, we defined what the QB check register is and for what purposes it can be used for managing business work. By laying out several methods for running, exporting, and printing the check register in different versions of QuickBooks, we hope that you would have surely learnt something new about the software.