
 +1-877-790-2297
Accrued expenses are also known as accrued liabilities. This is an accounting term referring to the expense that you recognize on the books before paying it. Such type of expense is recorded in an accounting period in which the expense is incurred. With an accrual method, you can keep your financial statements accurate such as the balance sheet and profits statement. If you want to know how to set up accrued expenses in QuickBooks Online, read the following guide carefully.
The blog demonstrates the meaning of accrued expenses and how to enter accrued expenses in QuickBooks Online. In addition, we will teach you to enter the bill, create a liability account, enter the journal entry, and close the books if required.
Learn About Accrued Expenses
If your business grants the products and services of the suppliers and you pay them in an accounting period, it is considered as accrued expenses. As every responsible business owner, you would want your expenses to align closely with the revenues to make your financial statements accurate.
Before you learn how to set up accrued expenses in QuickBooks Online, there are a few common examples of accrued expenses you should be aware of:
- Taxes
- Goods Received
- Services Received
- Utilities
- Interest on Loans
- Rent
- Commissions
- Wages for Employees
All these types of expenses can be accrued easily. This should be noted that accrued expenses should be available on the balance sheet of your company. It would be registered under the Liabilities section. To record the accrued expenses, you are required to create the accrued expenditure journal entry(Import Journal Entries into QuickBooks). In addition, you can set credit or debit on the accrued or unpaid expense so that you can have two different but identical entries for every transaction. Continue to read how to accrue expenses in QuickBooks Online.
How to Enter Accrued Expenses in QuickBooks?
Before you learn how to set up accrued expenses in QuickBooks, one should be aware of how to use the accrued expenses entry for debits and credits.
Accrued liabilities can be used for liability and spending the accounts. A debit entry basically boosts your expense accounts and your expense account goes lower by the credit. Whereas the credit boosts the liability account and debit entry decreases the liability account.
Note: Accrued or unpaid liabilities are temporary entries that users use to adjust the accounts especially during the accounting periods. Hence, you should create your first journal entry for the accrued or unpaid expenses then replace your original record with a different entry while paying the amount due.
Enter the Bill
To record the accrued expenses, you can enter the bill that you will be paying later. Please note that when you enter the bill, it directly goes to the Accounts Payable account. Follow these steps to enter your bill in QuickBooks:
- Click on the “+New” button.
- Then, select the “Bill” option.
- Choose the vendor using the “Vendor” drop-down menu.
- Now, select the terms of your bill using the “Terms” drop-down menu.
- After this, add the Due date, Bill no., and Bill date as these are recorded on your bill.
- In the “Category details”, you can add the bill information.
- Using the “Category” drop-down menu, you can choose the expense account you wish to track expense transactions.
- After this, you can add the description.
- In the “Item details” section, you can enter other details for products and services to itemize the bill.
- Once done, add the “Amount” and “Tax”.
- If you are planning to bill a customer for your expense then you should click on the “Billable” checkbox. Then, you can add the name in the “Customer” field.
- After performing these steps, you can click the “Save and Close” button.
Now that you have prepared the bill, you can pay it. Remember that when you are ready to pay the bill, you can record it using the Check or Pay bill option either.
Set Up the Liability Account
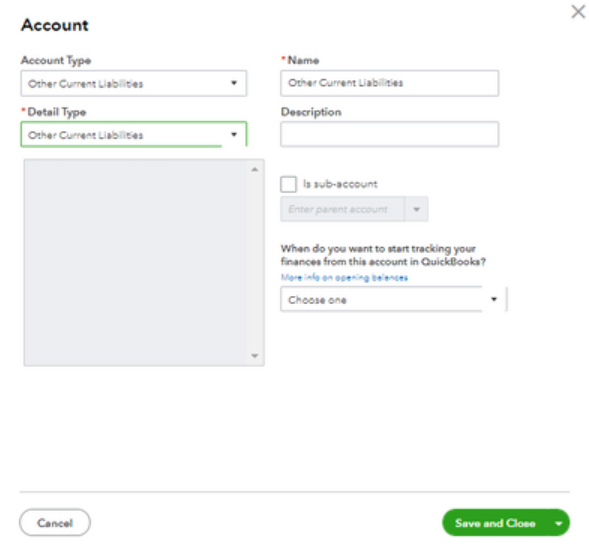
If you want to record your expenses under the specific accrued liabilities account then you are required to enter the journal entry. Here, we will show you to set up the liability account in the following steps:
- Navigate through the “Gear” icon.
- Then, select the “Chart of Accounts” option.
- Now, click on the “New” button to create your new account.
- After this, select the “Other Current Liabilities” using the “Account Type” drop-down menu.
- Then, choose the “Other Current Liabilities” using the “Detail Type” section.
- Add the appropriate name for the new account.
- Once done, click the “Save and Close” button.
Now that you have created the liability account, continue to add the journal entry. Read ahead to know more.
Enter the Journal Entry
By creating the journal entry, you can easily record your accrued expense. To know step by step details, check out the following steps:
- Click on the “+New” button.
- Then, choose the “Journal Entry” option.
- Click on the expense account using the “Account” drop-down menu.
- Add the amount in the “Debit” section.
- Now, using the “Account” drop-down menu, click on the liability account.
- After this, add the amount in the “Credit” column.
- Once done, add the memo for the transaction.
- Hit the “Save” button.
As you follow these steps, the liability account and journal entry will be entered successfully. Make sure you enter the correct details while following the steps.
How to Close the Books and Accrue Expense in QuickBooks Online?
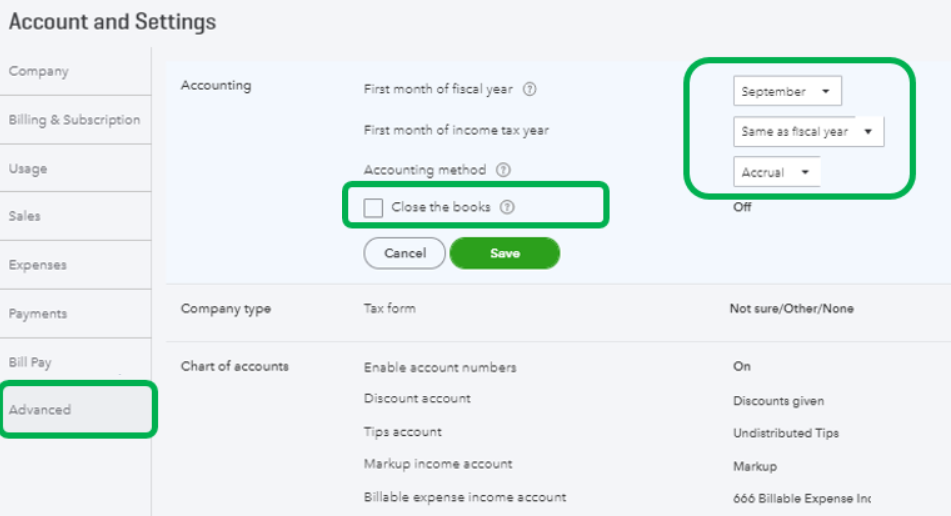
Now that you have learned how to accrue expenses in QuickBooks Online, you should also know what to do when you want to close the book. If you are using accrual accounting for a tax purpose and now want to close the accrued expense and books then you can perform these steps in QuickBooks Online.
- Navigate to the “Gear” icon.
- Then, click on the “Account and Settings” option.
- Switch to the “Advanced” tab.
- Click the “Edit” button from the “Accounting” section.
- After this, place a checkmark for the “Close the books” option.
- Now, enter the “Closing date”.
- At this point, you can set if you want to keep the password to change the closed transactions.
- After that, click the “Save” button.
By following these steps, you can easily close the book and accrue expenses in QuickBooks Online whenever required in the future.
In a Nutshell
Accruals expenses such as utilities, incur taxes, or salaries payable for which no invoice has been issued by the government. So, if required you can record the payment as accrued payment and pay them later in the accounting period. In this guide, we have learned how to set up accrued expenses in QuickBooks Online. Along with this, you have gone through a few important details that you should know regarding accrued expenses or liabilities.
If you have accidentally removed the customer from your account, read this guide on how to restore deleted customer in QuickBooks Online.