
 +1-877-790-2297
Inventory Adjustment in QuickBooks allows a retailer to mark the stocks as non-sellable due to broken or damaged goods. Retails may want to modify the number of units in stock as well. However, in some instances, retailers make a double entry for the inventory adjustments which they may want to delete later. Hence, in this blog, we will show you how to delete inventory adjustment in QuickBooks Online and Desktop versions.
What is Inventory Adjustment in QuickBooks?
The adjustment entries that are made in regular accounting for differences between actual and recorded inventory items are called inventory adjustments. Besides order shipments that are tracked in the Cost of Goods ledger, you may prefer to view in the Profit and Loss outline the modifications of stock.
This may happen due to the following reasons:
- Wastage (obsolete or expired inventory, for example, food)
- Shrinkage (inventory due to clerical errors or theft)
- Damaged Goods (goods that can’t be sold as a new product)
- Internal Use (for the purpose of marketing promotions)
To keep a record of this, you can adjust the stock in the ledger account. All you have to set up a reason such as Damaged Goods and send it to your designated ledger account. Thereafter, you can set up your stock adjustment reasoning in order to share it with a designated account in your QuickBooks Online.
How Do I Delete Inventory Adjustment in QuickBooks?
When making changes for the inventory adjustments, a lot of users mistakenly enter the inventory adjustment twice. This may create confusion later. Hence, it is important to delete the duplicate entries to avoid confusion.
Now, there are different ways to delete the inventories in QuickBooks. The steps may vary for each QuickBooks Desktop and Online version. Although, we will show you the best possible ways to eliminate duplicate entries for inventory adjustments. In QuickBooks, delete inventory adjustment by using the following instructions:
Delete Entry from the Inventory Part
- Launch “QuickBooks”.
- Login to your account.
- Click on the “New” button.
- Then, choose the “Inventory part”.
- Click on the “The Particular Item to be Deleted” option.
- Choose the “Quick Reports” option.
- Click on the “All Tab” and select the date range.
- Now, click right on the entry located next to the product entry that you wish to remove.
- Hit the “Delete” button.
If there are a number of inventory adjustments that you want to delete at once then you can follow the same steps and remove the multiple inventories in bulk. You can also click on the Save button in order to save the preferences and inventory adjustments.
Remove Inventory Adjustment in QuickBooks Online using the Advanced Search
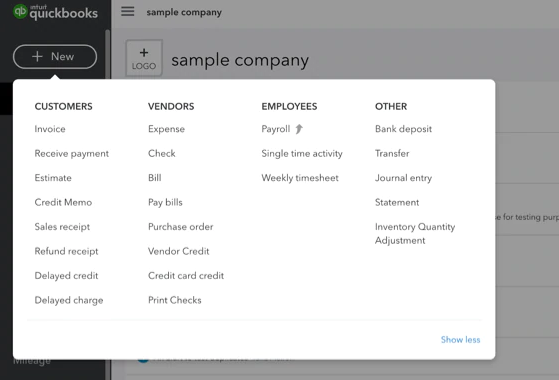
If you are using QuickBooks Online then using the Advanced Search option will help you to delete the inventory adjustment, you can also delete the inventory items in QuickBooks. All you have to select the Inventory Quantity Adjustment from the All Transactions drop-down menu. To learn how to delete inventory adjustment in QuickBooks Online, follow these steps:
- Click on the “Search” icon located on the toolbar.
- Then, choose the “Advanced search” option.
- Click on the “Inventory Quantity Adjustment” using the “All Transactions” drop-down menu.

- Now, adjust the other filters to narrow down your results.
- Then, hit the ”Search” button.
- Choose the transaction.
- Click on the “Delete” button located at the bottom.
Delete Inventory Adjustment in QuickBooks Desktop
In QuickBooks Desktop, delete inventory adjustment in two different ways; from the Edit or Inventory Activities options.
- Go to “Vendors”.
- Click on the “Inventory Activities”.
- Select the “Adjust Quantity/Value at Hand”.

- Click on the “Previous/Next” arrows to locate the adjustment to delete it.
Alternatively, you can do the following:
- Make sure your adjustment record is opened.
- Then, click on the “Edit” button.
- Select the “Delete Inventory Adjustment” or use the “Ctrl + D” keys to delete the inventory adjustment.
Delete Inventory Adjustment in QuickBooks Desktop by Performing Workaround
Some QuickBooks Desktop users can find it difficult to delete the inventory adjustments. In such a situation, you can create a new adjustment in order to offset your duplicate entries. To avoid confusion, you can add a memo later.
To do so, you can follow these steps:
- Click on the “Vendors” menu.
- Then, choose the “Inventory Activities” option.
- Click on “Adjust Quantity/ Value on Hand”.
- Enter the required information.
- If you decrease the quantity then “QTY Difference” should display as negative.
- In the “Memo” field, add a note.
- Click the “Save & Close” button.
After following these steps, you can check the Inventory Valuation Detail report and make sure they are correct.
- Click on the “Reports”.
- Then, click on the “Inventory” option.
- Choose the “Inventory Valuation Detail” report.
- Check the items you adjusted. Make sure the details are correct.
Once you are done creating the new adjustment and adding a memo, it will offset the duplicate entries you added for inventory adjustments.
How to Delete Inventory Starting Value?
It is important to make sure that your books are accurate. Besides inventory adjustments, if you prefer to delete the starting value of inventory, you just need to delete the amount linked with the inactive inventory product.
To do so, you are required to reactivate the items in the settings. Thereafter, you can change the initial cost. Here are the steps for that:
Reactive the Item
- Click on the “Sales” menu.
- Then, choose the “Products and services” tab.
- Click on the “Filter” icon.
- Choose the “Inactive” button using the “Status” drop-down menu.
- Hit the “Apply” button.
- Select the items that you want to reactivate.
- Click on the “Make active” option using the “Action” drop-down.
- Select the “Clear Filter” option to return to the active items list.
Remove the amount
- In the “Products and services” tab, find the items.
- Choose the drop-down button located near the “Edit” button.
- Select the “Adjust starting value”.
- Now change the $50 amount to zero that displays as the “Initial cost”.
- Hit the “Save and close” button.
This way you can remove the amount to make sure that your books remain accurate. All you have to do is reactivate the items and change the cost to zero. This will remove the inventory starting value.
Endnote
In this guide, we have shown you how to delete inventory adjustment in QuickBooks Online and Desktop in the best possible ways. If required then you can delete the inventor starting value and adjust the inventory adjustments in order to make sure the adjustments are accurate.