
 +1-877-790-2297
When you refresh QuickBooks or its payroll service, you may receive QuickBooks error 12031. This update error arises when your internet is not working properly. As a result, it restricts your accounting software to access the server. Other factors such as Windows Firewall and Antivirus programs can also be the reason behind this error. However, if you are looking for help, you can read this blog carefully.
- What are the Leading Causes of QuickBooks Update Error 12031?
- How Do I Fix Error 12031 in QuickBooks?
What are the Leading Causes of QuickBooks Update Error 12031?
Before moving ahead, one should be aware of the major reasons due to which you are facing QuickBooks error 12031. This way you can have a better understanding to resolve the error.
- Network Timeout: While using QuickBooks for Payroll services, if your server is taking too much time to respond to a particular command then your software will stop responding.
- Internet Connection: Poor network connection is one of the major reasons that you are facing difficulties connecting to the server. Sometimes, your internet performs an alternate connection due to which your QuickBooks software stops working and comes up with an error.
- Default Browser: QuickBooks uses Internet Explorer by default. If you have not set the Internet Explorer browser as your default browser, it is likely to encounter error code 12031 on your screen.
- Firewall or Internet Security Settings: Windows Firewall often blocks the connection between programs. If QuickBooks is added to the block list, it may restrict your software to work properly.
These could be the major reasons behind update errors in QuickBooks. However, if you fix all the settings such as configuring the Windows Firewall and internet settings then you may get rid of unwanted errors in QuickBooks.
How Do I Fix Error 12031 in QuickBooks?
Fixing the QuickBooks update error 12031 can be easy if you implement the right solution. As you are now aware of the main causes of update error so you can execute the troubleshooting method accordingly.
Through this guide, we recommend you configure internet properties, set the website zone up to medium-high, disable content advisor, and adjust the LAN settings. It is also important to make sure what USE TLS service you are using. Besides that, you should run the Windows system in safe mode or update QuickBooks to the new release.
Fix 1: Configure Internet Properties
Wrong internet settings can cause unexpected errors. To avoid or prevent that, you are required to configure your internet settings. For this, you should open the Internet Properties, switch to the Advanced tab, and make sure that advanced settings are matching.
You can pursue these instructions:
- Open the “Internet Explorer” on your Windows computer.
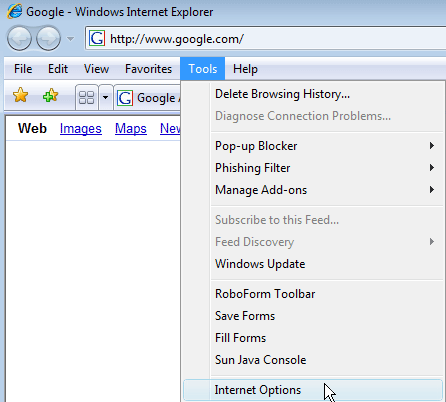
- After that, move to the “Tools” option using the main menu.
- Click on the “Internet Options”.
- Now, switch to the “Advanced” tab.
- Here, you need to make sure that your advanced setting is matching correctly.
- Hit the “Apply” button.

- Press the “OK” button and close the window.
Once you are done performing these steps, you can restart your computer. Then, you can refresh your QuickBooks software and verify if you encounter any update errors.
Fix 2: Verify the Zone for the Internet Websites
The zone of internet websites should be set up to the medium-high. If it is set higher than that then you may confront issues while accessing the internet. To set the right level of the zone, you are supposed to follow these steps:
- Launch the “Internet Explorer” on Windows PC.
- Then, go to the “Settings” option located on the top right.
- Now, select the “Tools” option.
- Here, you can click on the “Internet Options”.
- After this, switch to the “Security” tab.
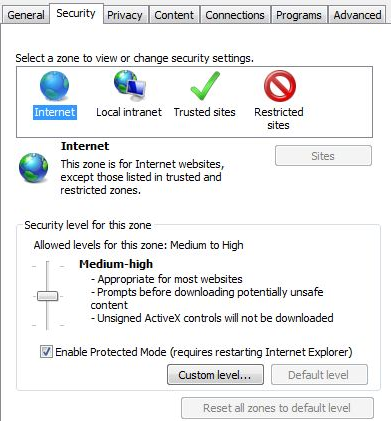
- Click the “Internet” option with the globe icon. At this point, you are supposed to make sure that the zone of the website is set up to medium-high. It should not be higher than that.
Once you are done verifying the zone, you can refresh your Windows computer. After this, try accessing QuickBooks to check if the server is performing fine.
Fix 3: Disable Content Advisor
Content Advisor is the section that can be found in the Security tab in the Internet Options. By disabling the content advisor, you may fix the error in a few clicks.
- Open the “Internet Explorer” on your PC.
- Then, navigate through the “Settings” menu located on the top right.
- Here, move to the “Tools” option.
- Now, you can select the “Internet Options”.
- In the “Internet Options” window, move to the “Security” tab.
- Then, in the “Content Advisor”, you need to see what it says. If it shows the “Disable” option then enter your password and disable it.
As you disable the content advisor from the Internet Options, the update error will vanish. All you have to do is refresh your computer and try updating QuickBooks.
Fix 4: Adjust the LAN Settings
By adjusting the LAN settings, you can configure the internet connection. If required then you can use the proxy server. To understand in detail, you can go through the following steps:
- On your Windows computer, launch the “Internet Explorer”.
- Then, click on the internet settings from the main menu.
- You can now select the “Tools” option.
- After this, select the “Internet Options”.
- Now, switch to the “Connections” tab.
- Here, you need to click on the “Never dial a connection” option.
- At this point, you can use a dial-up mode.
- It is also important to make sure that the right ISP is chosen.
- Here, the “OK” button has to be pressed.
- Now, click on the “LAN” settings.
- At this stage, you need to have marked the “Automatically detect settings” option.
- After this, you should ensure that the “User a proxy server” option is not selected.
- Now, you can use your proxy server and document the address along with the port. If the port shows “Port 80” then you should uncheck it, but if you see something other than “Port 80” then make sure you don’t uncheck it. After this, use your proxy box to test.
- Once done with the “LAN” settings.
- Press the “OK” button.
When you are done following these steps, make sure you restart your Windows PC. After that, you can continue accessing QuickBooks. It should be working efficiently by now.
Fix 5: Ensure USE TLS 1.0 is Enabled
In Internet Options, users are required to ensure that USE TLS 1.2 is not selected. If it is selected then you should remove the checkmark. Check out the following steps to be sure what should be selected and what not.
- Open the “Internet Explorer” browser on Windows.
- Then, go to the “Settings” option from the top right.
- Here, jump to the “Tools” option.
- Now, you can go to the “Internet Options”.
- Select the “Advanced” tab.
- Then, click on the “Restore advanced settings” option.
- In the “Settings” section, you can scroll to the “USE TLS 1.0”, “USE TLS 1.2”, and “USE TLS 1.1” options.
- Here, you need to make sure that the “USE TLS 1.0” is chosen and the “USE TLS 1.2” is not selected.
- Press the “OK” button.
Now, you can close the Internet Options window. Make sure you reboot your system after performing these steps. To verify if the issue has been resolved, you can launch QuickBooks software and try updating it.
Fix 6: Download QuickBooks Updates
Intuit releases new updates for your QuickBooks software so that it can work efficiently. If you are facing any kind of errors in QuickBooks, you should always update your software. In most cases, updating the software resolves the problem.
- To get started, close the QuickBooks program if it is running.
- Now, press down the “Ctrl” key on the keyboard until you see the QuickBooks window open on your system.
- Then, move to the “Help” menu.
- Click on the “Update QuickBooks Desktop” option.
- Here, you need to hit the “Update Now” option.
- Then, press the “Get Updates” button.
- Press “OK” if prompted.
Now, you can close the QuickBooks Desktop window and open the software again. If it shows any prompts to download the new updates, you can accept it. Once done with the installation, make sure you verify if the update error is still hopping on your screen.
Fix 7: Start Windows in Safe Mode with Networking
By starting your Windows system in Safe Mode, you can rectify a number of errors. To enable the Safe Mode, you need to get into the Advanced Boot Options after booting the system. Here, we will show you to start Windows in safe mode with networking for both Windows 7 and Windows 10.
Enable Safe Mode on Windows 10
To get into Safe Mode, you need to prepare installation media, for example, DVD and USB bootable devices. After that, you can boot your Windows computer. If you are using Windows 10, you can perform the following steps to enable Safe Mode with Networking.
- Boot your PC.
- As it restarts, click on the “Repair my computer”.
- Select the “Troubleshoot”.
- Click on the “Advanced options”
- Choose the “Startup Settings”.
- Hit the “Restart” button.
- Now, hit the “F5” key to “Enable Safe Mode with Networking”.
Enable Safe Mode on Windows 7
The process of enabling safe mode on Windows 7 is quite different from Windows 10 PCs. Those who run Windows 7 can follow these steps to enable Safe Mode.
- Hold down “F8” as your system restarts.
- When you see the “Advanced Boot Options”, you can use the “Up” and “Down” keys to select options.
- Here, you can select the “Safe Mode with Networking” option.
- Now, the “Enter” key has to be pressed.
Once your Windows system gets into Safe Mode, you can try accessing QuickBooks. This will allow your system to run smoothly without facing any errors.
To Wind Up
QuickBooks error 12031 occurs due to the incorrect settings of the internet connection. If you configure the internet settings, the error can be rectified easily. In this guide, we have given you numerous solutions through which you can fix the internet connection. After that, you can refresh or update QuickBooks and its payroll services.
QuickBooks update errors can occur with different error codes. If you encounter QuickBooks error 15227 then read this guide to find effective methods.